Due to a large demand for support regarding this function, we have created an explanatory video. In the video, you will be guided step by step through the creation of the product variations. You can watch the video or work through the article below. The content is the same. The video has been recorded with German audio. You can watch it with adapted English subtitles.
For cases when some similar products visibly differ by one feature and have different names (for example, several "color variants" of a T-shirt). These products appear as separate items in the store. On the product page, customers can also select the desired feature value. To accomplish this, set up variants for products with this feature.
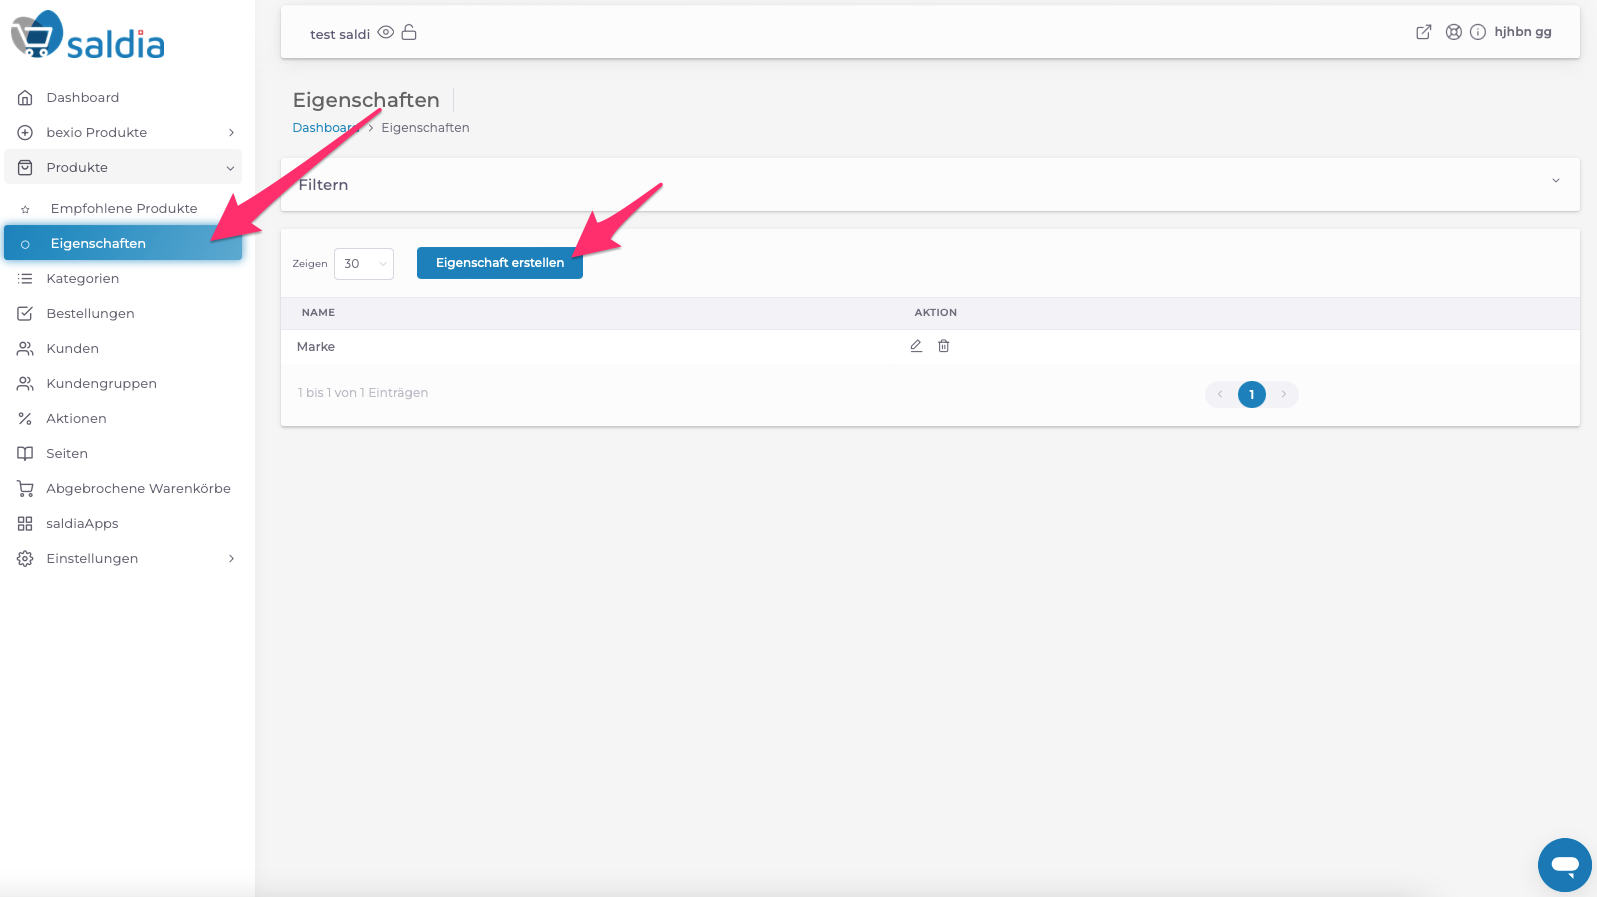
1. Go to "Properties" under "Products" in the dashboard. Click on the "Create Property" button.
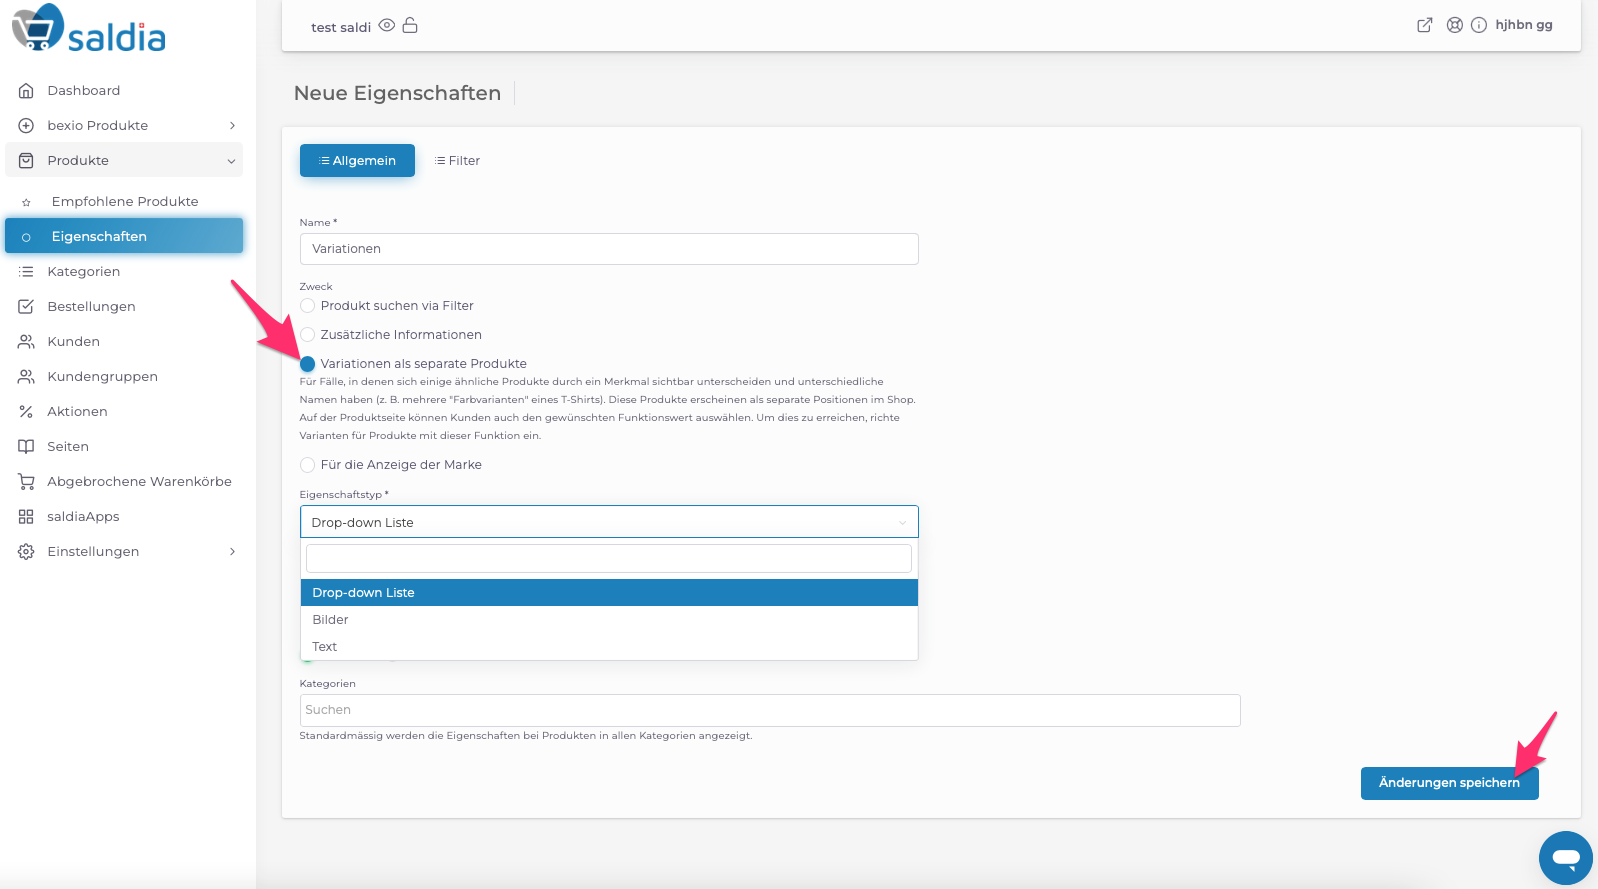
2. Select the option "Variations as separate products" to create product variations. You can also choose whether the variations should be displayed as a drop-down list, images, or as text. Save the settings.
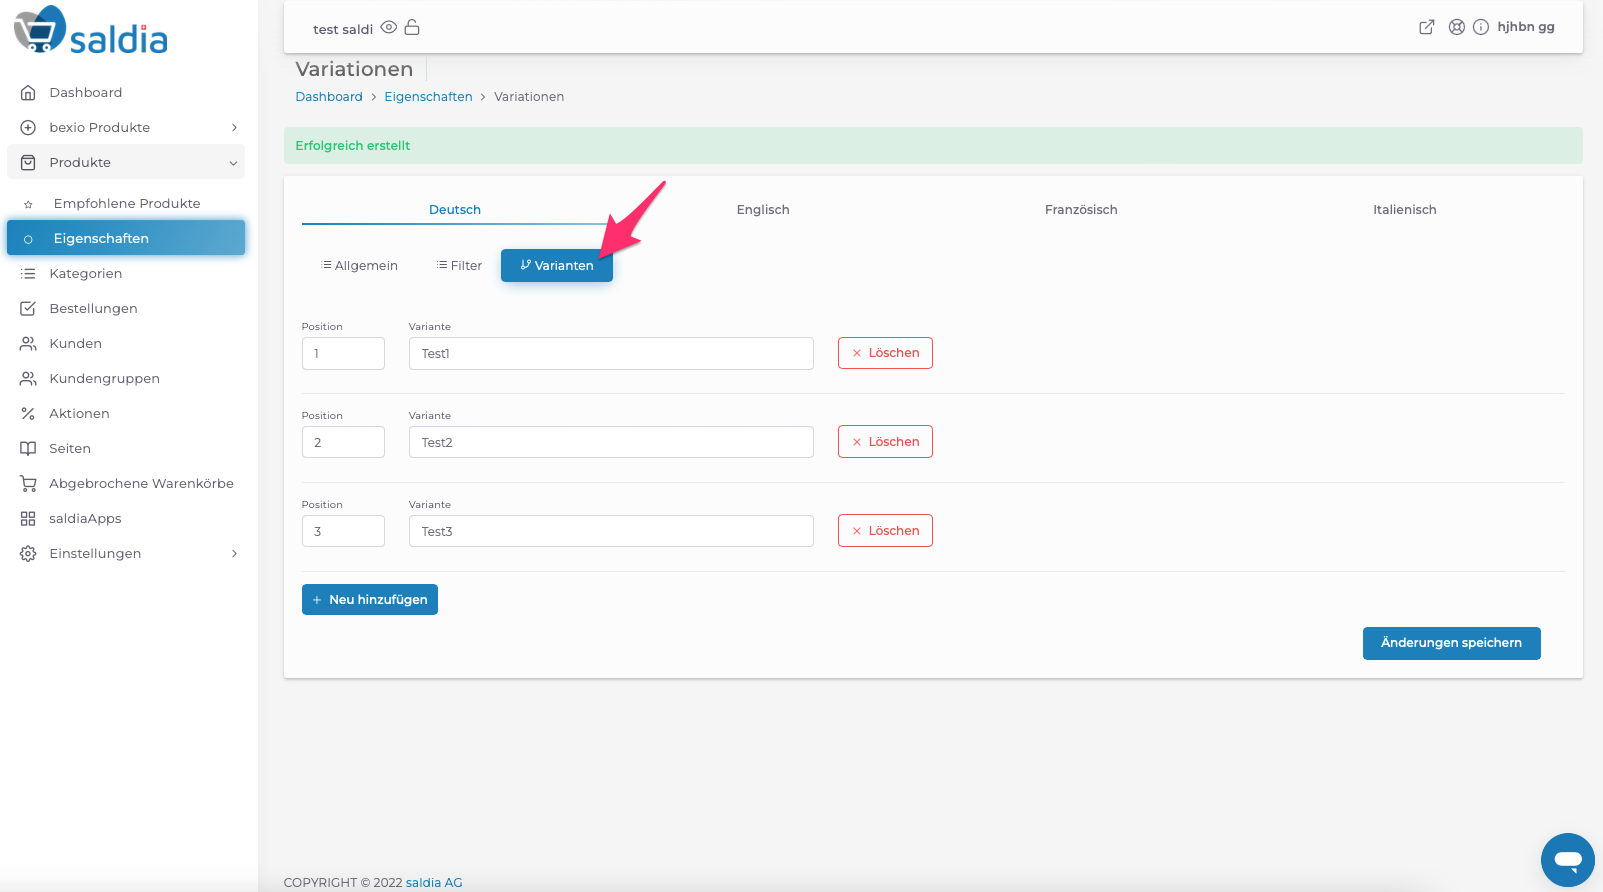
After saving, the "Variations" menu will appear. You can add as many variations as the product has. In the "Variation" field, enter a characteristic of the variation (e.g., color) and click "Save Changes".
4. To assign the variations to the product now or to create a new product with variations, go to "Products" and create a new one or click on an existing product to edit it.
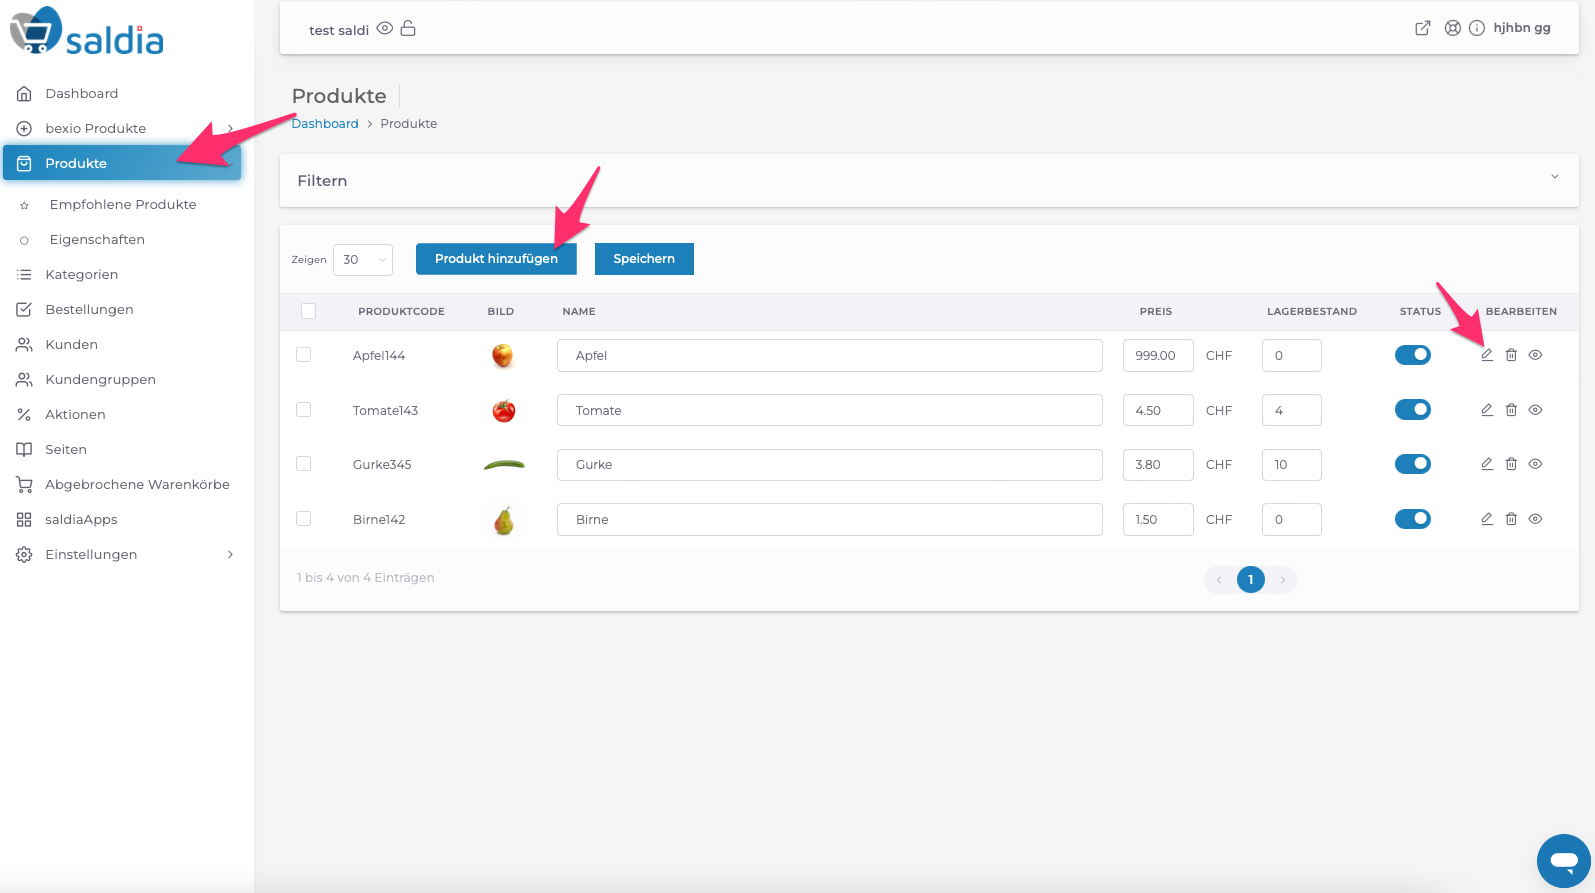
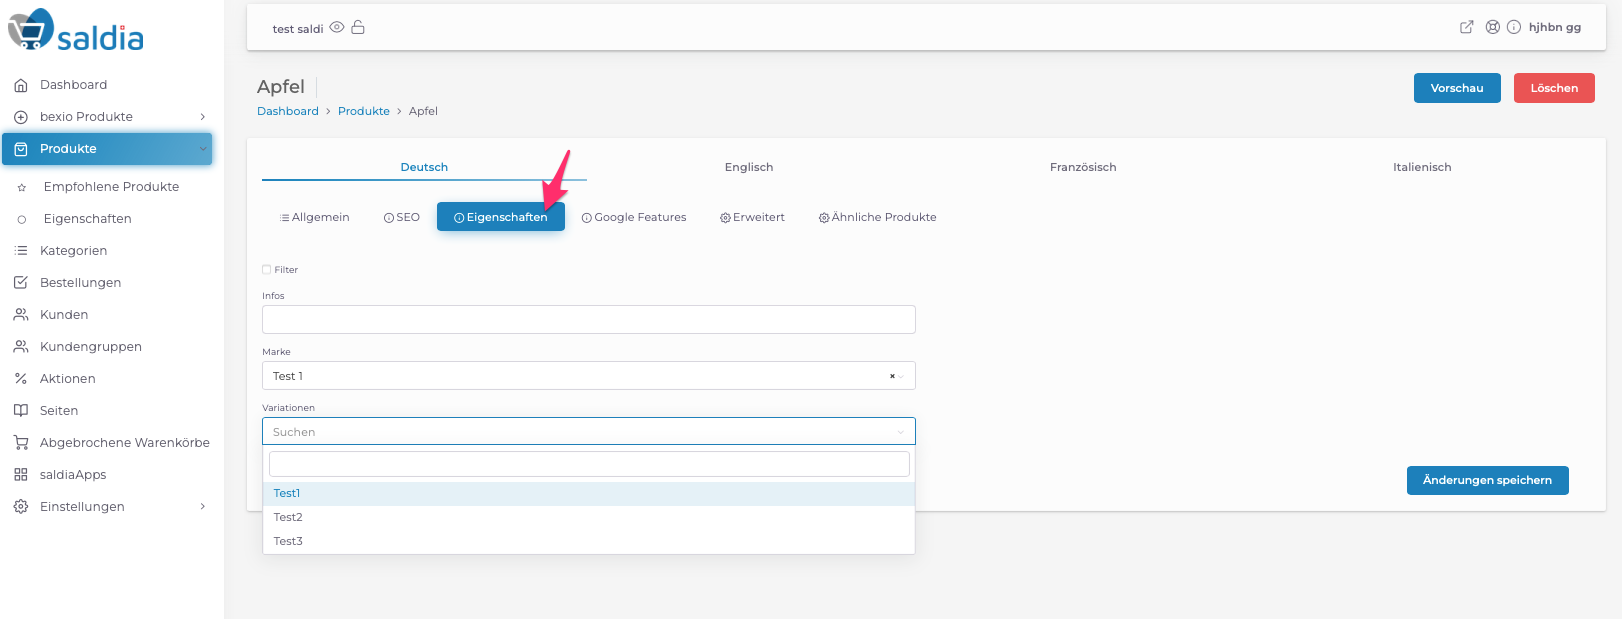
5. If you want to add a variant to an existing product, you can select it in the product settings under "Attributes".
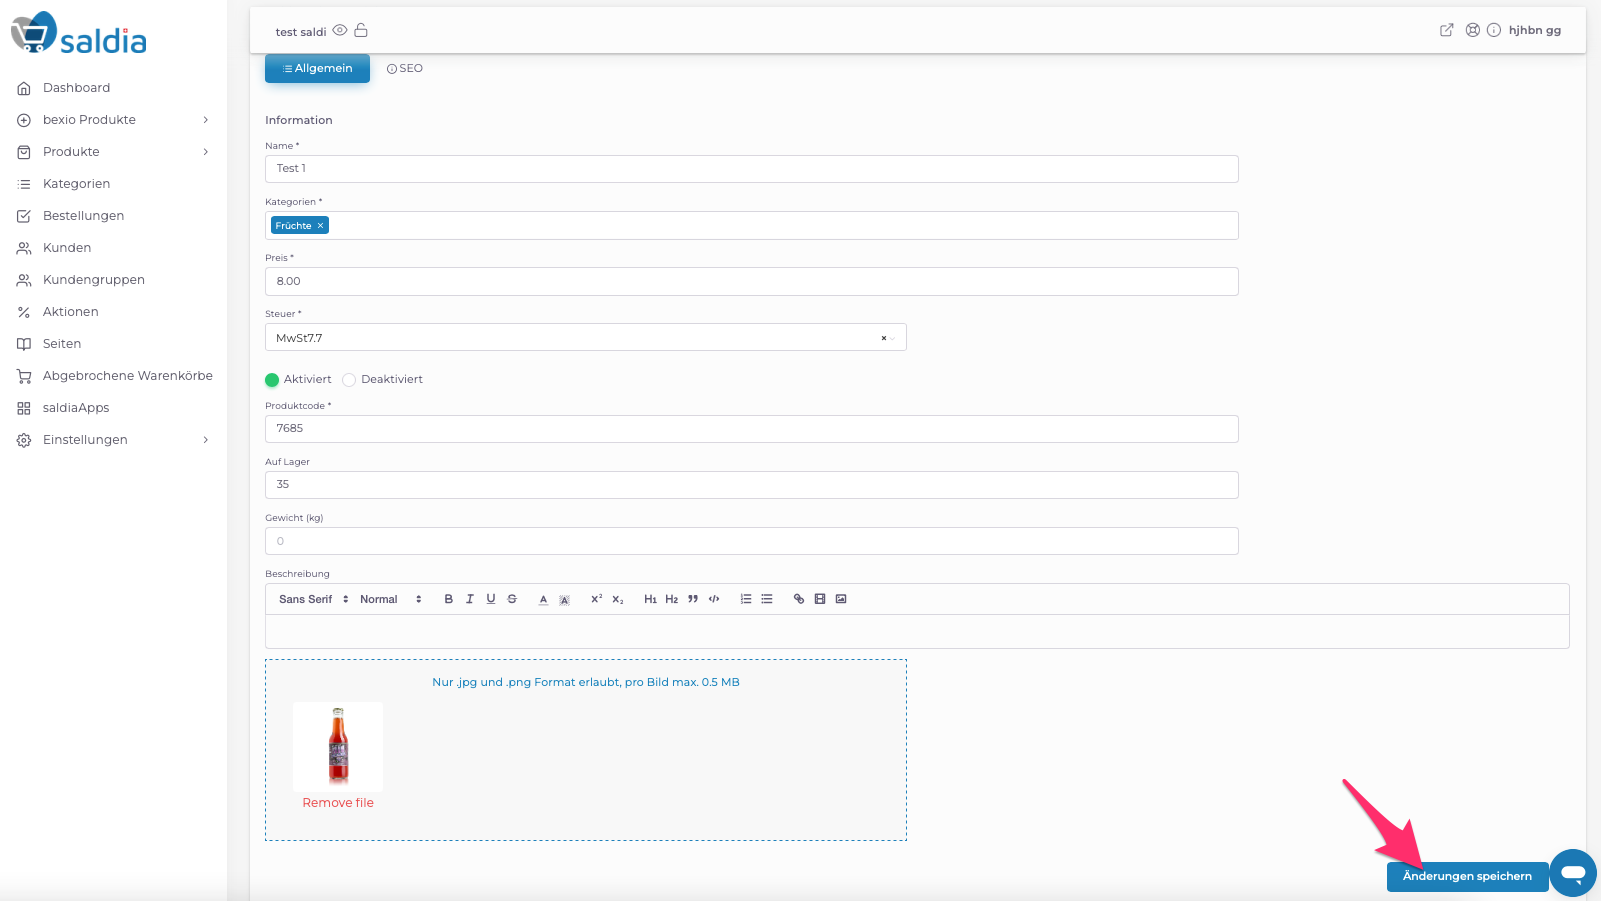
6. When creating a new product, enter all the product details and click "Save Changes." If you need help creating the product, go to the support article. Add Products.
7. After saving the product, the menu item "Properties" appears. There, the variation you created is now displayed. Select which variant this product is and save again.
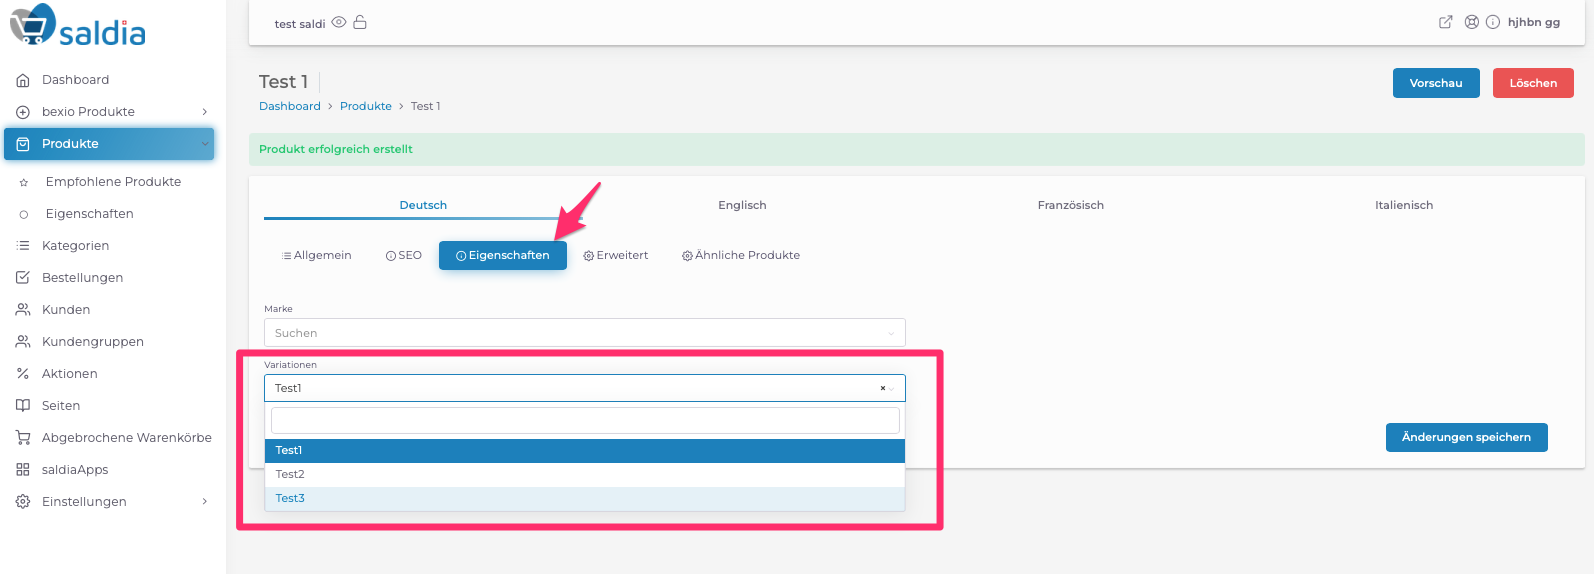
8. When you have selected a variant, the menu item "Variations" will appear after saving. Click here to "Add Variations".
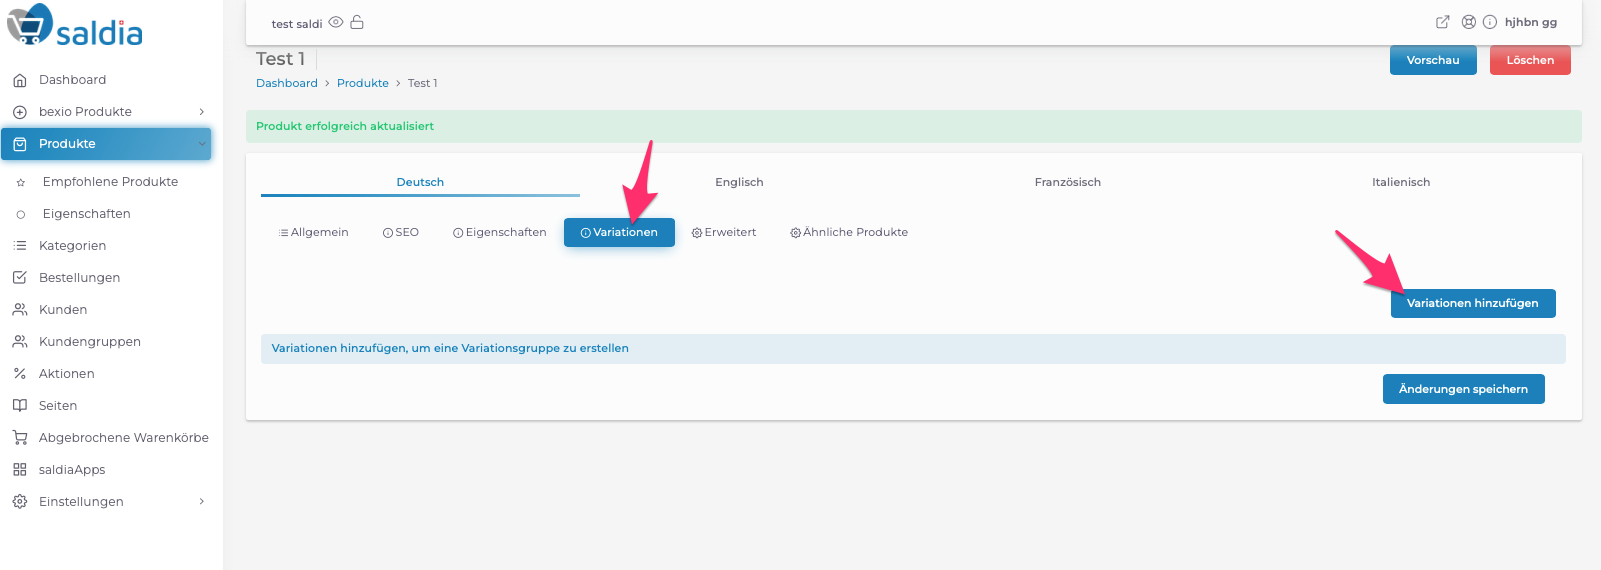
9. You can select variations here that are created as a clone of the current product, as a new product, and can then be edited.

If the products already exist, go to the tab "Use Existing Products". Here, products will appear to which you have already assigned a variant.

Click on save when you have created or selected the desired variants.
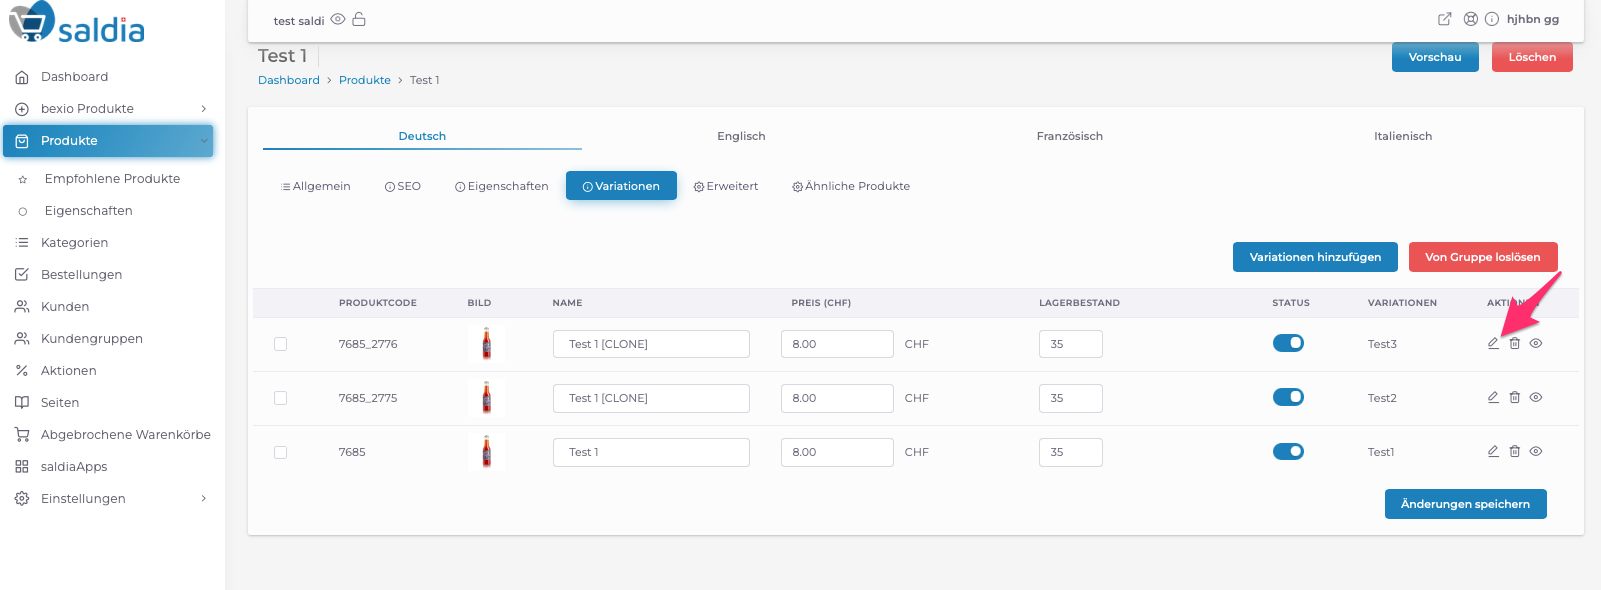
10. When you create new products, you can click on the "edit icon" for the desired product to edit the new variant. Upload new product images, change the name, etc. Click on "Save changes" when you have made all the changes to the new products.
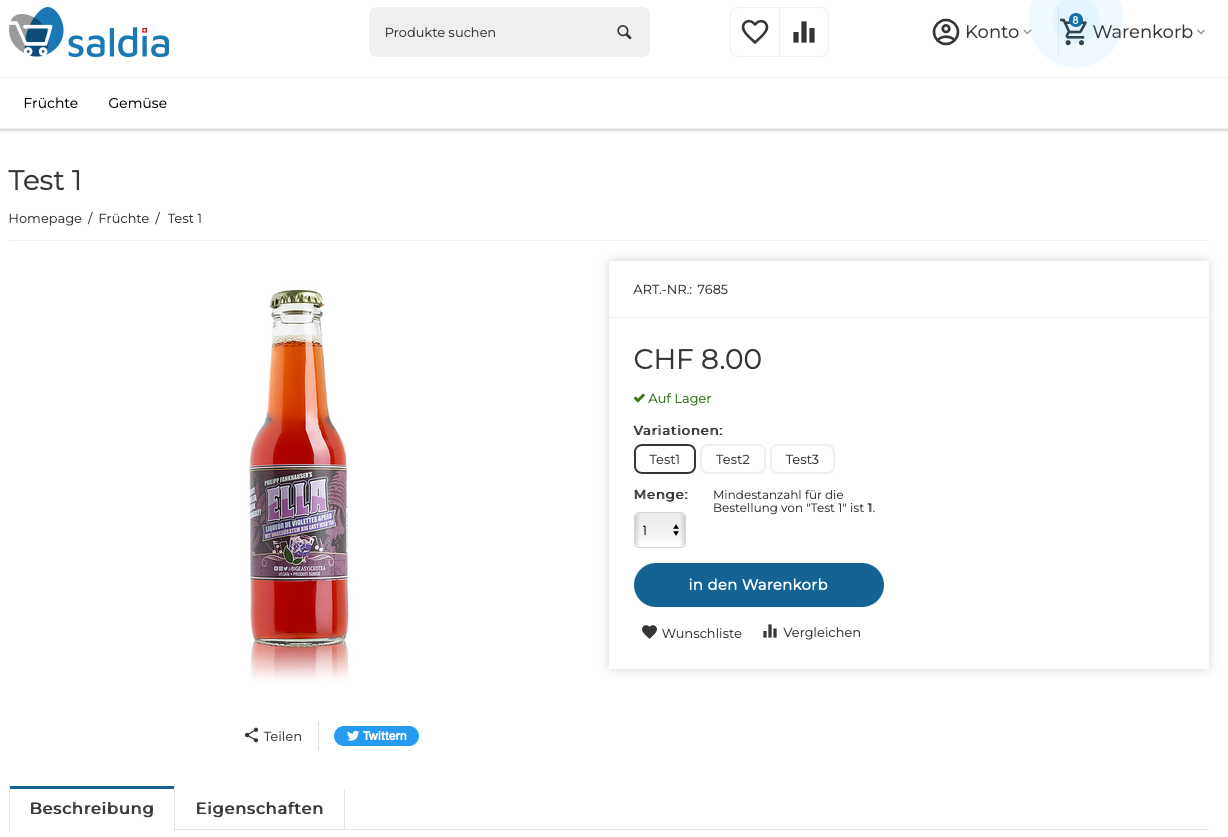
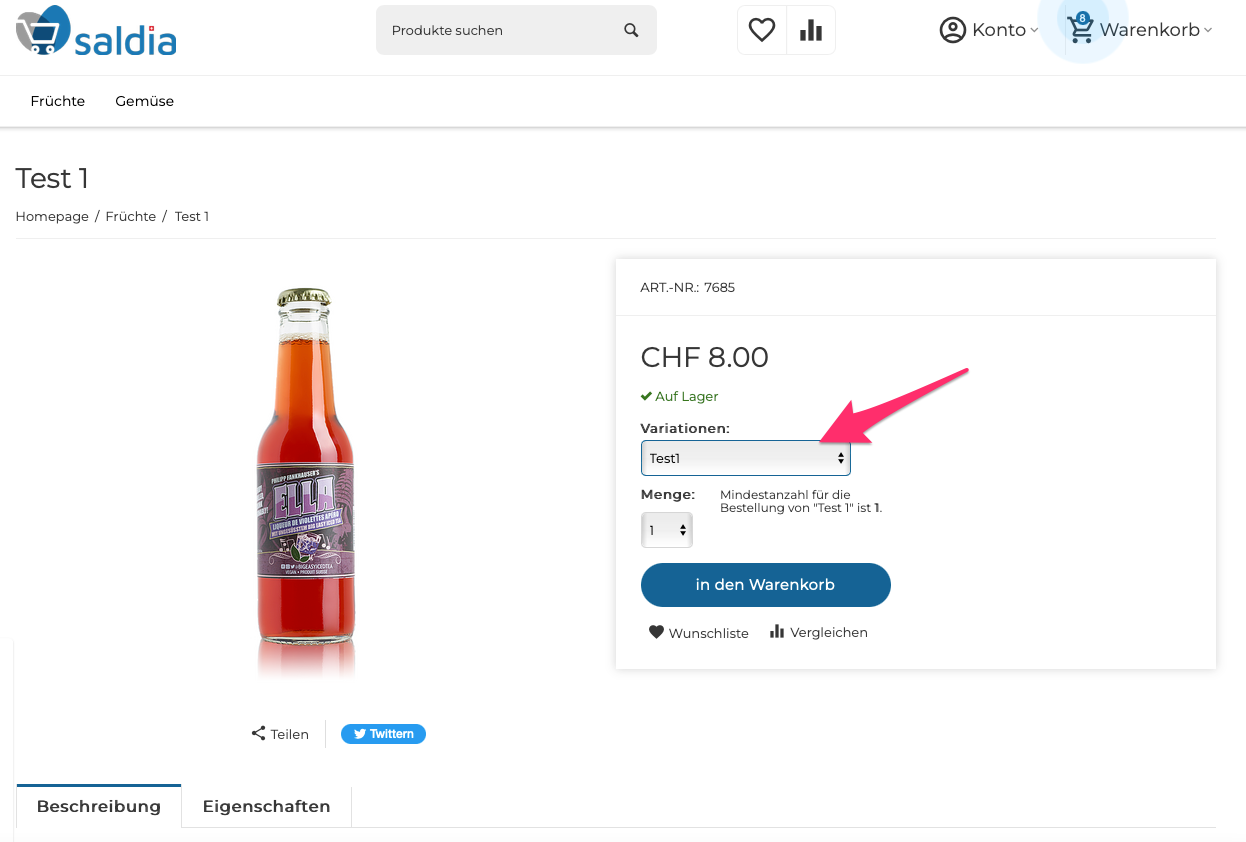
If you select the property type "Drop-down List" when creating the variants, it now looks like this in the shop:
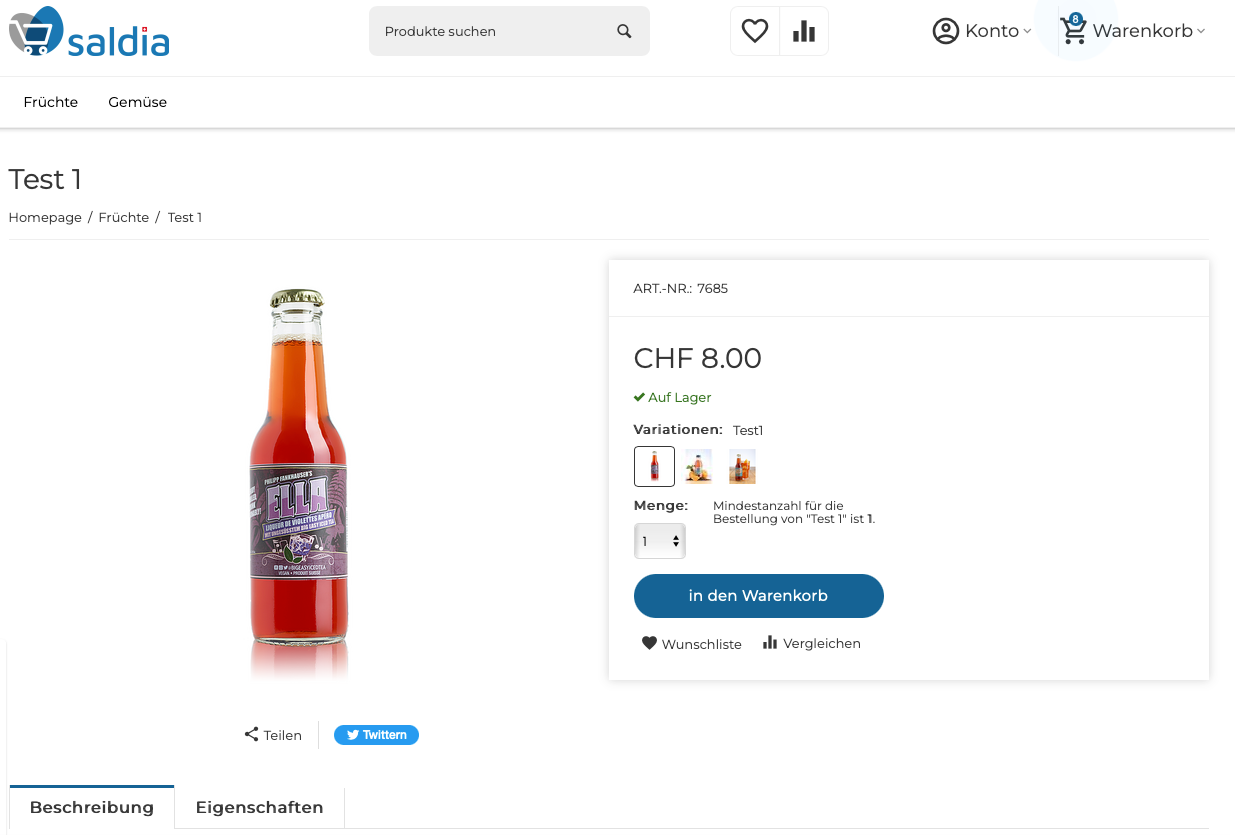
For the property type "Images," it looks like this:
And with the property type "Text," it looks like this:
